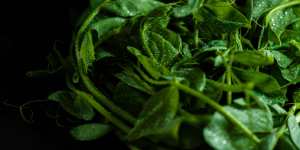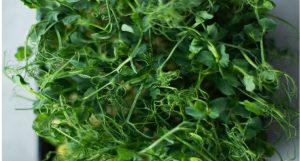
This month’s seed kit features Afila Tendril Peas. To support our environment, seed kits are now available digitally.
Afila Tendril Peas (Pisum sativum)
Light green in color with mild to slightly sweet and nutty flavor and an abundance of tendrils. Afila Tendril Peas adds flavor and texture to salads, sandwiches, and more!
Planting Instructions
Note: Can be grown for use as microgreens or as standard peas. Microgreen growing instructions follow. For peas, see the instructions for Little Marvel Peas in our seed kit archive at https://aclibrary.org/garden/seed-kit-archive/
Culture: Can be grown indoors! If indoors, select a sunny window or use a grow light to ensure that they receive adequate light.
Start by soaking your pea seeds in water for 6-12 hours. Add sterile soil to a shallow tray or pot with drainage holes and a bottom tray to allow bottom watering (recycled plastic fruit or pie containers will work for this purpose). Firm the soil gently and add water to the bottom tray. Spread peas evenly across the soil leaving a little space between each one. Cover the peas with a thin layer of soil and tamp down gently, then spritz the soil with enough water to moisten, but not saturate, the soil.
To encourage germination, cover the tray with a piece of cardboard or other opaque material so that the seeds are “in the dark.” Remove the cover after two days. You should see the beginnings of sprouts! Keep growing tray in a well-lit area. Add water to the bottom tray as needed.
Harvest: Harvest when pea shoots reach 3-6 inches in height, about 9-11 days. Using scissors or a sharp knife, cut shoots just above the soil line.
More About Afila Tendril Peas
Native to the Mediterranean and West Asia regions, peas, beans, and grains were one of the earliest domesticated crops. While their origin is unknown, evidence of domesticated peas dating back to the Neolithic period has been discovered in Turkey and Iraq. These early forms of domesticated peas, known as field peas, were likely cultivated to be dried before consumption. Field peas quickly spread throughout Europe and other varieties of the plant emerged. One such variety, the garden pea, was discovered at an archaeological site in Switzerland dating back to ≈3,000 BCE. The garden pea was cultivated primarily to be eaten fresh. Ancient Greeks and Romans also cultivated the garden pea and spread the plant to India and China. Later, European settlers introduced the plant to North America.
In the mid-1800s Gregor Mendel—often referred to as the “father of genetics”—examined garden peas to study hereditary traits. By breeding pea plants and identifying patterns in the passing of traits, such as plant height, seed shape, and seed color, Mendel discovered the principle of dominance and recessiveness in genetic inheritance. The Afila Tendril pea—the result of a spontaneous genetic mutation first identified in 1958—was very advantageous for farming as it produces a pea plant that grows numerous tendrils rather than heavy leaves. When densely planted, the tendrils of the Afila pea plants vine together to create a tall, self-supporting canopy, lifting the pea pods high above the ground and protecting them from pests and disease.
Pea Shoot Salad with Lemon Vinaigrette
Serves: 4 Prep time: 10 minutes Cook Time: 10 minutes

Ingredients:
- ½ cup of fresh or frozen peas
- 1 large bunch of pea tendrils chopped
- Handful of mint leaves roughly chopped or torn
- ¼ cup of shaved parmesan cheese
- 1 tbsp. lemon juice
- ½ tsp. lemon zest (optional)
- 1 clove garlic minced
- ¼ cup of extra virgin olive oil
- 1 tsp. white wine vinegar
- ½ tsp. sugar or honey
- ¼ tsp. kosher salt
Instructions:
- In a bowl, whisk together lemon juice, lemon zest, garlic, olive oil, white wine vinegar, sugar or honey, salt, and pepper.
- In a large bowl, toss together pea shoots, peas, mint, and parmesan cheese.
- Pour dressing over salad and toss.
Craft: Tool Cleaning Bucket

You’ll Need:
- Metal or plastic bucket
- Sand (grittier sand works best!)
- Mineral oil or another general-purpose lubricating oil
- Paint or markers to decorate
Instructions:
- Decorate your bucket however you want before starting.
- Fill the bucket with sand up to the 3/4 full mark.
- Pour in the mineral oil. The size of the bucket determines how much oil to put in; generally, 20-30 oz of oil to 50 lbs. of sand. You can adjust as needed.
- Mix the oil, looking for a moist, but not dripping, consistency. Add more oil if needed.
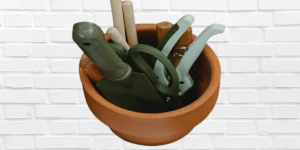
- Add your tools to the bucket. You’ll want to leave the handles outside the sand. The abrasive sand and the oil keep tools sharp, well-lubricated, and rust-free.


Add a comment to: November 2023: Afila Tendril Peas