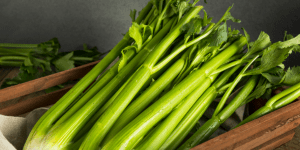
This month’s seed kit features Utah Celery. To support our environment, seed kits are now available digitally. Scan the QR codes on the seed packets to download planting logs, delicious recipes, fun craft ideas, and coloring pages.
Utah Celery
Tall, medium-to-dark green with sweet, crunchy stalks, this plant has a compact growth habit and is a good choice for gardens with limited space.

Planting Instructions
Culture and Water: Prefers loose, rich, well-drained soil, and tends to rot in oversaturated, heavy soils. Planting season in the Bay Area is April - August.
Sow approximately 1/8 inch deep in pots or rows about 18 inches apart. Thin or transplant to about 6 inches apart after plants are several inches tall and have several sets of leaves.
Water: Keep soil moist, but not saturated, until seedlings emerge in 14-21 days. After that, provide even moisture regularly to prevent the soil from becoming too dry. Celery likes moisture, and stalks may split if they become too dry. A top dressing of compost or mulch will help keep the roots cool and moist!
Harvest: Reaches maturity in about 100 days. It can be harvested either whole or, to extend the season, in “cut and come again” fashion. For “cut and come again,” cut outer stalks near the base of the plant when they reach at least 6 – 8 inches in height. The inner stalks will continue producing and can be trimmed when they reach the desired height.
Culinary Tips: Celery is a good addition to soups or salads. Use the stalks to scoop peanut butter or cream cheese for a tasty snack. The leaves are tasty too and give good flavor when used as an edible garnish or seasoning.
More About Utah Celery
Modern celery descends from an ancient plant, known by the Latin name Apium graveolens, which was native to the Mediterranean Basin. This early ancestor to modern celery was first cultivated for the medicinal properties of its seeds, which were believed to treat colds, flu, indigestion, arthritis, and more. In the 1620s, French scientist Olivier de Serres began cultivating a variety of celery for consumption. By the late 17th and 18th centuries, celery was being cultivated throughout Europe, and in the 19th century, celery made its way to America. Several new varieties of celery emerged and a growing technique, known as blanching, was developed to produce plants with milder, more palatable flavor. However, this process also reduced the quantity that could be harvested, which quickly made celery a luxury item and a symbol of status. Wealthy families would often display celery as an ornamental fixture on their dining room tables in elaborate celery vases, arranged like a bouquet of flowers.
The Utah 52-70 Celery variety is a fast-maturing variety that is resistant to disease. Celery is a nutrient-rich, low-calorie food, and an excellent source of fiber and vitamin K.
Cream of Celery Soup
Serves: 4 Prep time: 15 minutes Cook Time: 40 minutes

Ingredients:
- 5 lbs celery ribs, sliced
- 3 cloves garlic, minced
- 2 large onions, diced
- 3 medium potatoes, peeled and diced
- 3 tbsp. extra virgin olive oil
- 6 cup of vegetable stock
- 1 cup of heavy cream or coconut milk
- 1 bay leaf
- 1 tbsp. of lemon juice
- 1/8 tsp. of cayenne pepper
- ½ tsp. of kosher salt
- ¼ tsp. of ground black pepper
- Celery leaves (for garnish)
Instructions:
- Heat oil in a large stock pot over medium heat, sauté onions until translucent, about 5 minutes. Add garlic and cook for another minute.
- Add celery, potatoes, vegetable broth, and bay leaf. Bring to a boil. Reduce heat to low, cover, and simmer until potatoes are tender, about 30 minutes.
- Remove from heat and bay leaf. Either transfer to a blender or use an immersion blender. Pulse the blender to puree until smooth. Return the puree to a clean pot and add heavy cream or coconut milk. Stir over medium-high heat.
- Add lemon juice, cayenne pepper, and season with salt and pepper to taste.
- Garnish with celery leaves.
Craft: Bee Hotel

You’ll Need:
- An empty, clean plastic cup
- Modeling or air drying clay
- Bamboo canes
- String
- Stickers or paint to decorate
Instructions:
- Place a bamboo cane into the cup and cut the cane where it reaches the top of the cup. Cut remaining canes to the same length.
- Put the ball of clay in the bottom of the cup. Push the clay down so it fills the bottom.
- Fill the cup with the bamboo canes, pressing them firmly into the clay. Continue filling the cup until it’s full.
- Decorate the cup any way you want. Lay the cup on its side and attach string to the front and back of the cup.
- Hang the bee hotel in your garden, preferably in full sun or partial shade!


Add a comment to: April 2024: Utah Celery